

Sage Intacct's Close Workspace helps bring structure by creating a centralized, AI-powered environment for managing the close.
For many finance teams, month-end close still means juggling spreadsheets, chasing down task owners, and reacting to issues too late in the process. For accounting teams under pressure to close faster without sacrificing control, the challenge is often less about effort and more about coordination.
Close Workspace helps bring structure to that experience by creating a centralized, AI-powered environment for managing the close with reusable checklists, clear ownership, real-time status tracking, and proactive notifications through Sage Copilot. The result is a more organized, visible, and efficient close process with fewer bottlenecks and fewer last-minute escalations.
Close Workspace elements
Close Workspace is organized into four key structural layers, ranging from high-level template categories to detailed checklist templates.
- Template categories — The highest level of the Close Workspace, this should be thought of as the purpose of the template. Common examples are month, quarter, or year close.
- Task category — A way to group tasks based on use case or function. Common examples are based by module such as accounts payable or cash management.
- Task template — A list of all the to-do items per checklist. These are set up with generic business day defaults to drive when the task should start and finish based on the reporting end date. Negative numbers can be used to indicate the task should start before the month is over.
- Checklist template — The final standardized to-do list. It combines all relevant task templates and assigns employees at the company or entity level.
Close Workspace setup
Setting up Close Workspace is generally a one-time effort, with minimal ongoing maintenance as you expand the level of detail, adjust responsibilities, and refine close timelines.
1. Enable, configure, assign permissions
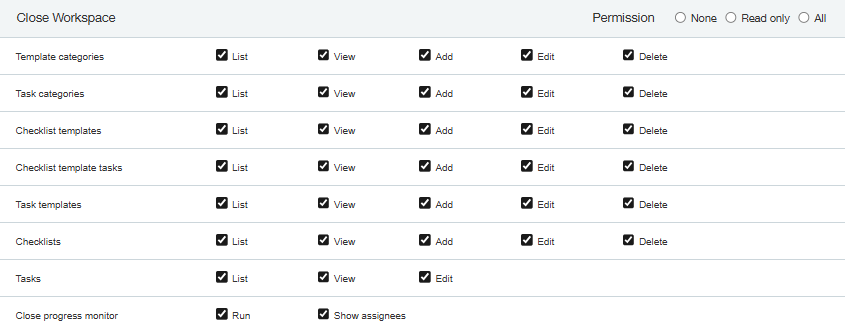
Enablement happens under the Close Automation subscription. Once turned on, you’ll be able to configure to take into account weekends/holidays during date calculations. Roles should also be set up to determine levels of access to separate ownership responsibilities from assignee responsibilities.
2. Customize system task templates
Close Workspace comes preloaded with generic task templates, such as reviewing unposted transactions and performing reconciliations. These can be customized to reflect company-specific start dates and target completion dates.
3. Create template categories
Create a custom template purpose if needed beyond the system-standard month-end, quarter-end, and year-end options.
4. Create close task categories
Create task categories for additional functions/modules beyond system standard listing.
5. Create close task templates
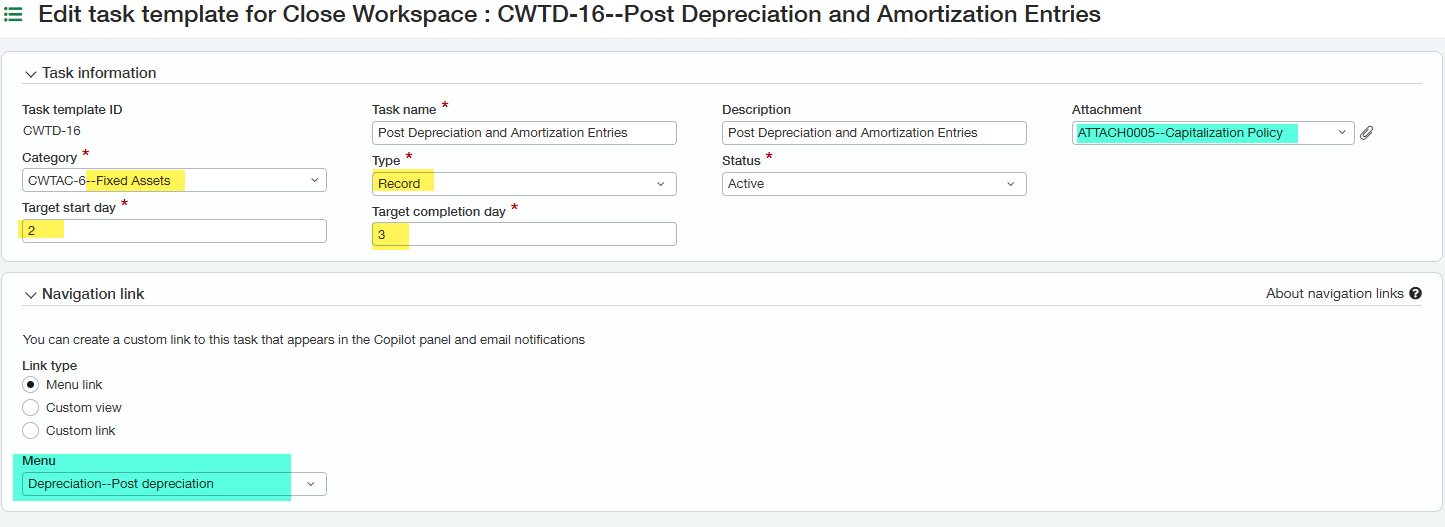
Task templates are the core of Close Workspace and represent the individual to-do items within the close process. Once set up, each task template can be used across multiple checklist templates.
Each task template is associated with a task category and a task type (record, review, report, or reconcile). You can then define the task’s start and end dates using offsets from the last day of the reporting period.
Internal Intacct links and external resources can also be added to speed navigation, while attachments can provide supporting documentation and connect users to standard operating procedures.
6. Create close checklist templates
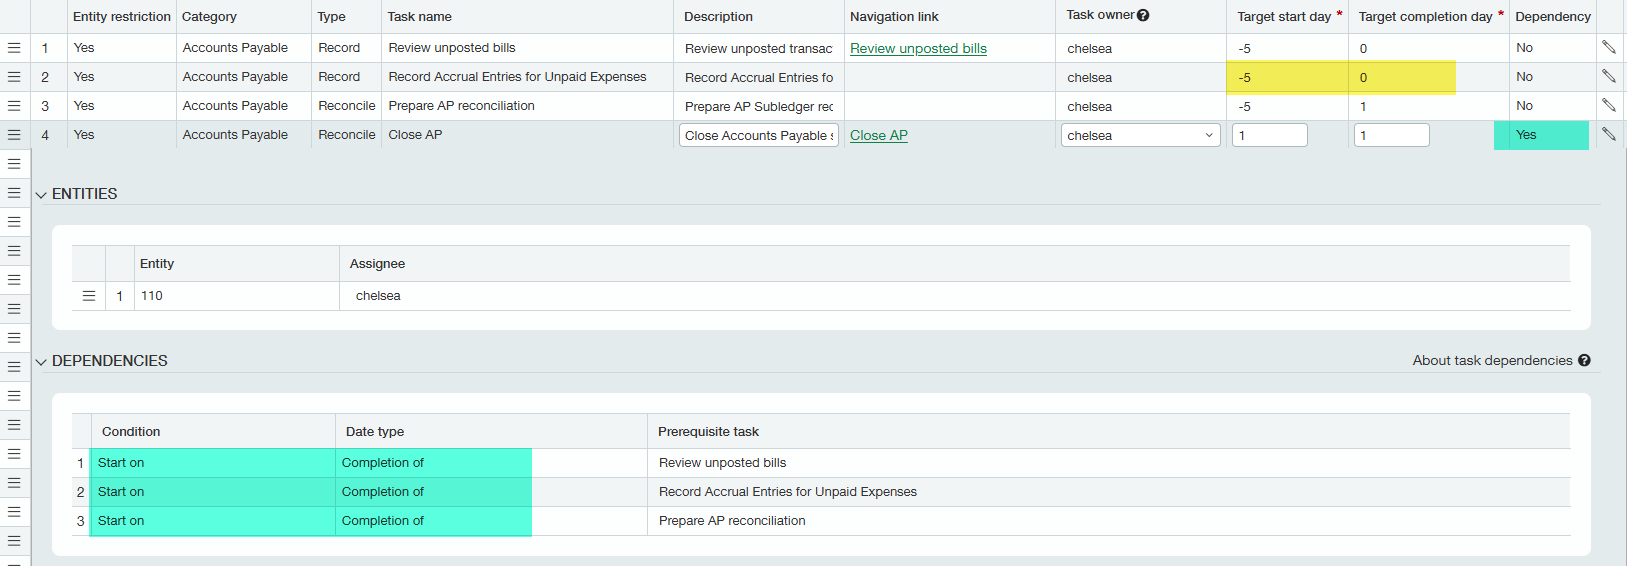
Once all task templates are properly set up, you can create your checklist template by adding the appropriate task templates and arranging them in the correct order. This becomes your standard to-do list that can be rolled out each month and updated as the company evolves. At this stage, you can assign task owners (the people responsible for verifying tasks are completed) and task assignees (the people who perform the tasks), adjust estimated timelines, and build dependencies.
7. Customize email notifications
In addition, you can configure email notifications to work alongside Sage Copilot and help keep the month-end close moving forward. These emails can be triggered based on task timing and customized for approaching deadlines, overdue tasks, at-risk tasks, completion of dependencies, daily summaries of open tasks, and a final checklist completion celebration.
Managing the close
Once your checklist template is set up, you are ready to manage the close using the Close Workspace. This includes customizing the list for your specific reporting period, interacting with tasks and assignees, and monitoring progress.
1. Create checklist
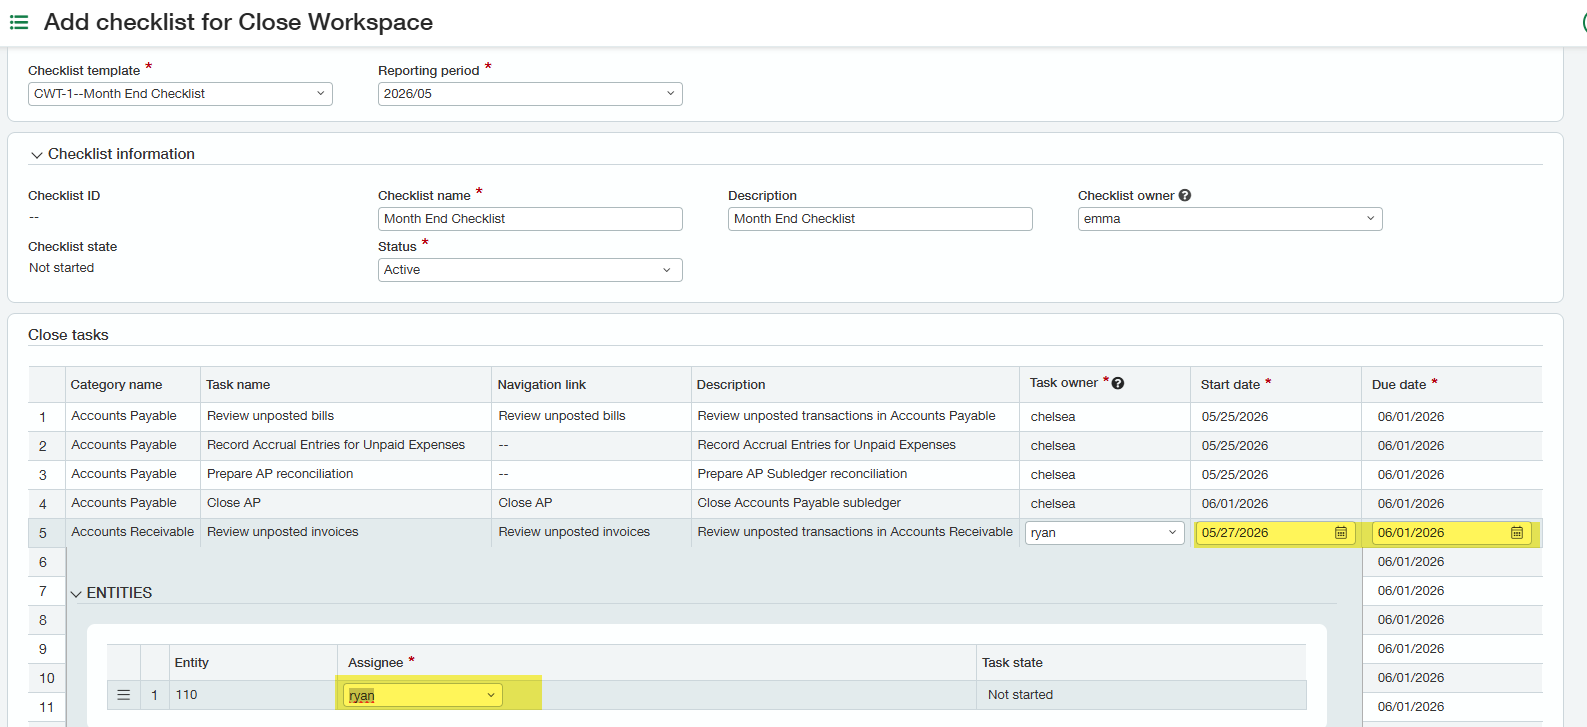
Here’s where you choose which checklist template to use and the reporting period. These reporting periods can be the system standard budgetable periods or custom periods. This is where everything becomes dated, the day offsets are then applied to specific days with the ability to override. Changes can also be made to the owners and assignees.
2. View and edit close tasks
After creating the checklist, the owner can still make modifications to adjust dates and responsible parties as part of the month-end planning.
3. Start the close
You can mark a single task as in progress or the entire checklist as in progress to begin the close.
4. Progress through the close
As tasks are started and completed, assignees can update each task’s status in the checklist, moving it from not started to in progress and then to completed. color-coded status indicators show green for on track, orange for at risk, red for overdue, and blue for completed.
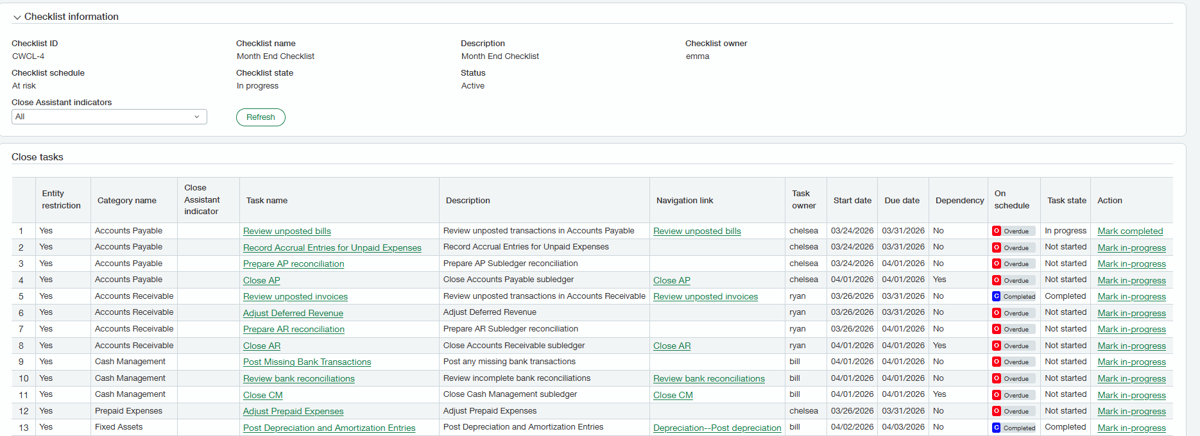
Tip: Administrators can edit entries layouts to change the column order.
5. Collaborate during the close
Pair it with Sage Collaborate to maintain a steady stream of dialogue around each task, increasing efficiency and accountability throughout the close.
6. Finish the close
Once all tasks are complete, the checklist schedule and checklist state are marked as “completed.”
Reporting on the close
Embedded within Close Workspace is the Close Progress Monitor. This permission-based view consists of two sections: task insights and task assignment insights.
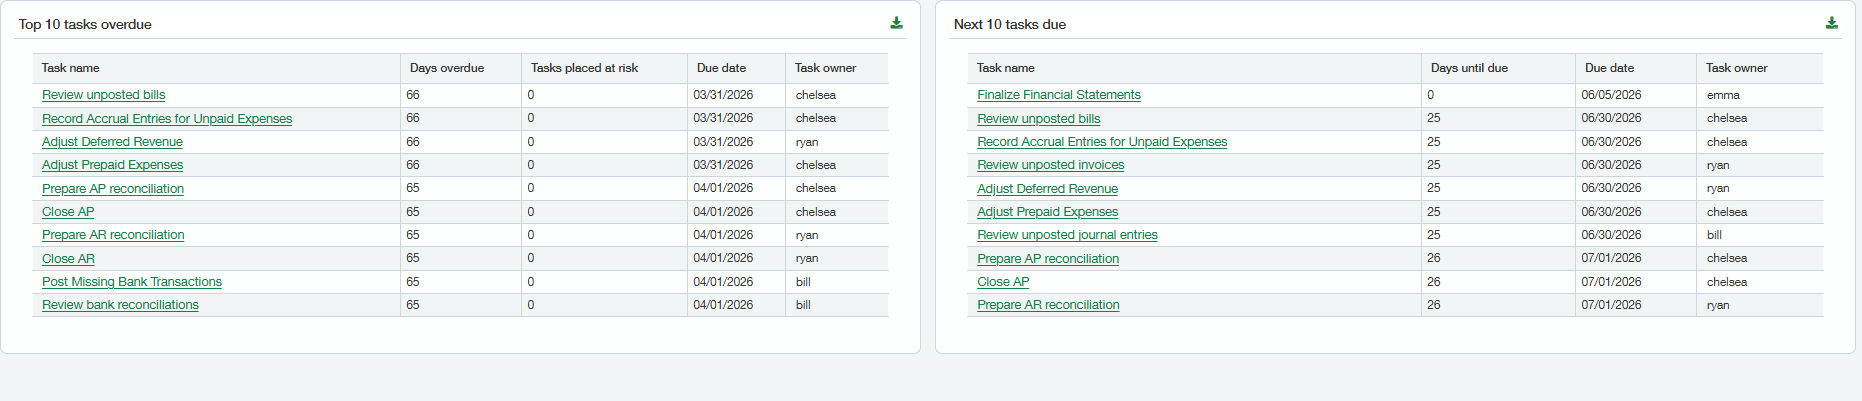
Task Insights provides a high-level summary of the close, allowing you to view multiple checklists at a time and hone in on specific reporting periods. Bar chart and table visualizations show the number of overdue, at risk, on track, and completed tasks summarized by your custom task categories. The top 10 overdue tasks are also highlighted, including the days overdue, the number of dependent tasks now at-risk, the original due date, and the responsible owner.
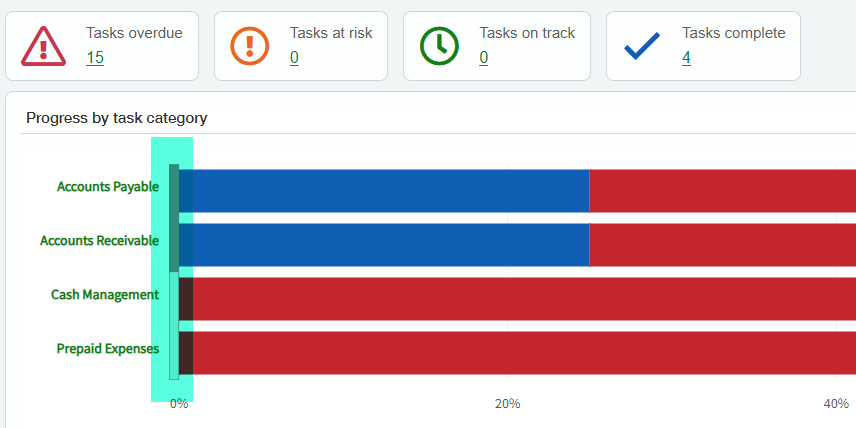
Tip: Use the scroll bar on the left to see all categories.
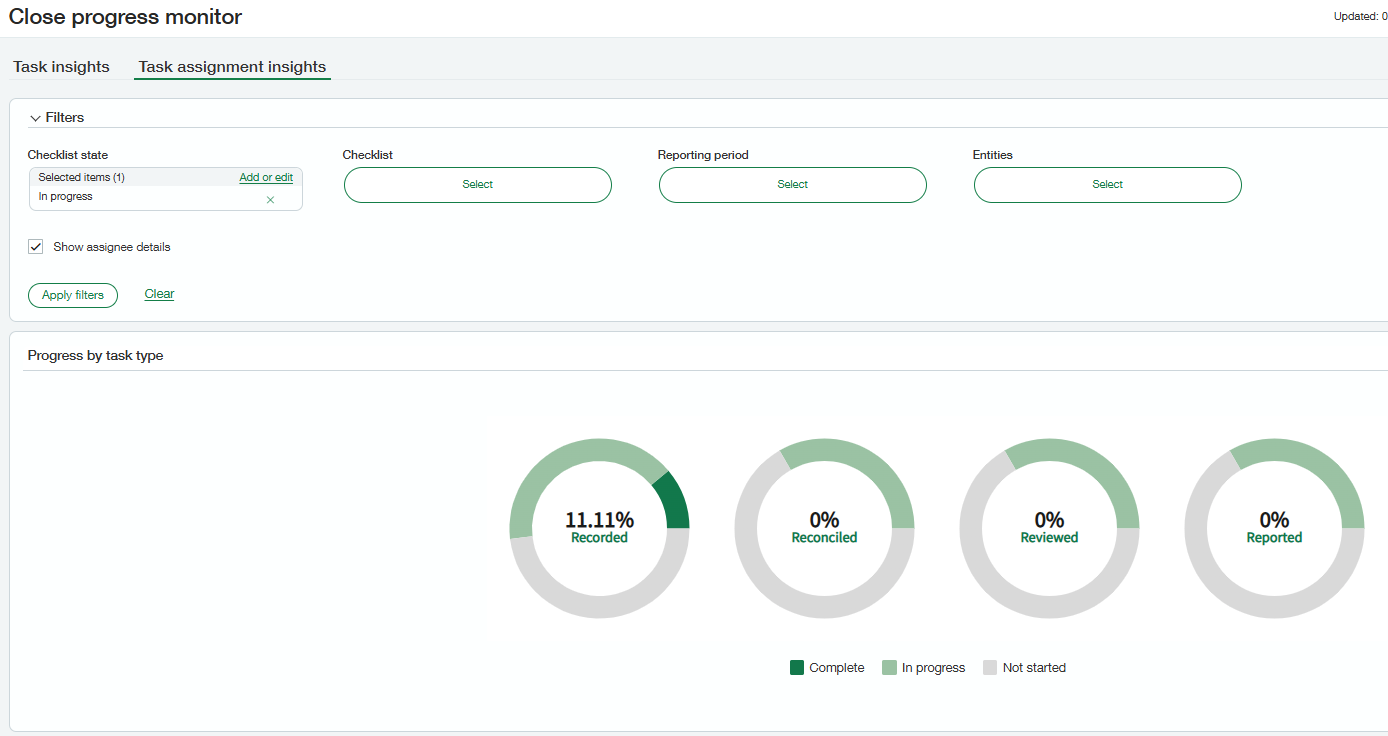
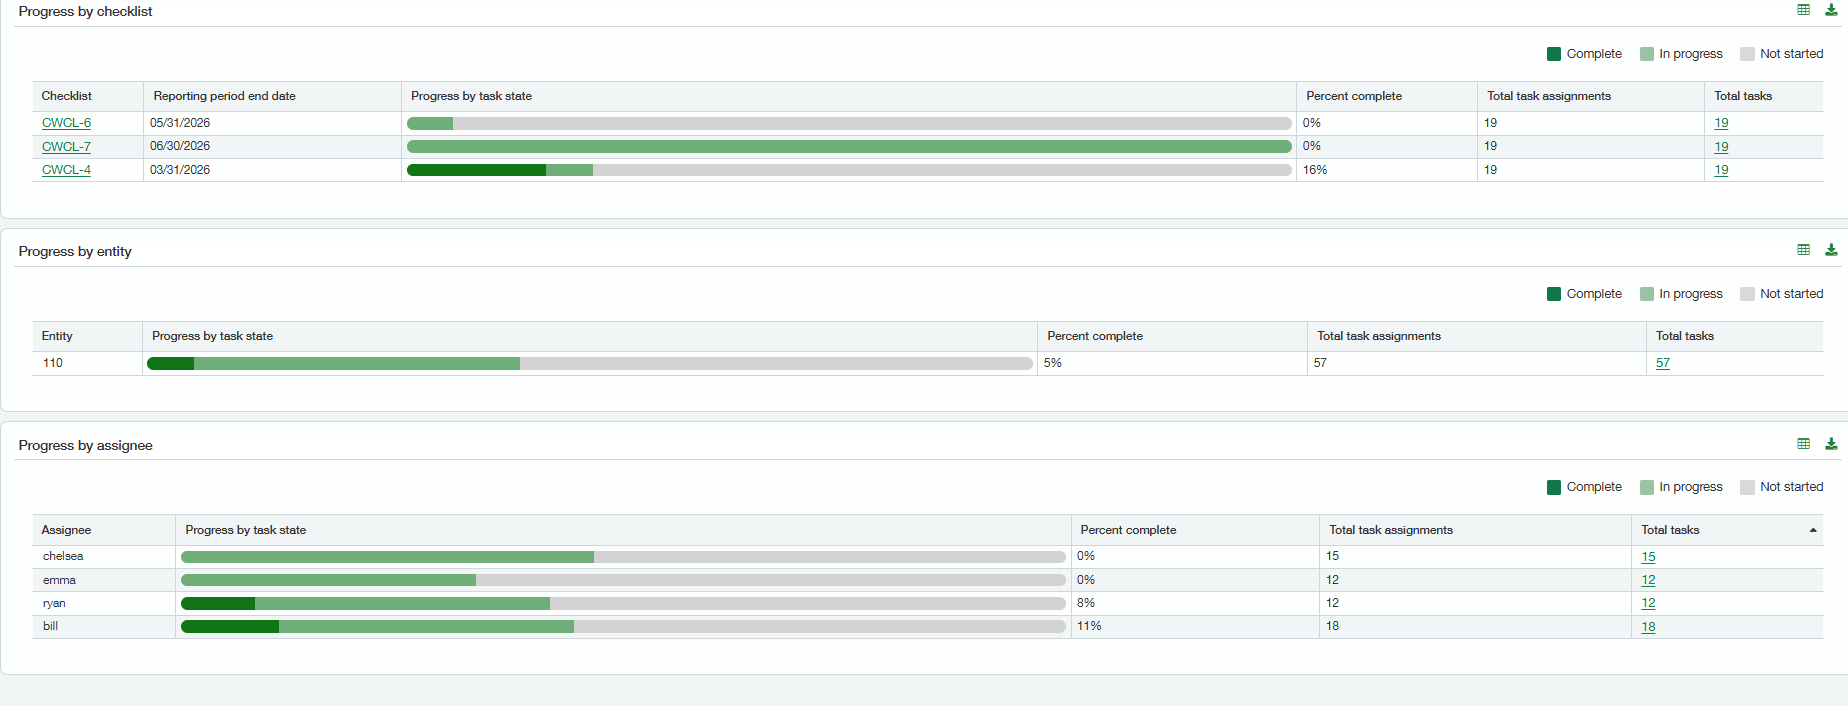
The task assignment insights section provides a high-level overview of the task types. These are defined as record, review, report, and reconcile — the 4 Rs of the close. The data is then broken out by task state, including complete, in progress, and not started. additional views also show status by checklist, entity, and assignee.
When paired with Close Assistant, Close Workspace gives accounting teams a more standard and visible way to manage the close across teams and entities. It helps reduce reliance on spreadsheets, improves accountability, and surfaces bottlenecks earlier in the process. Most importantly, it supports a more controlled close by lowering the risk of missed steps, delayed reviews, and reporting delays.
Subscribe to the blog to be notified when we share more about Close Assistant in a future post.